Moka Pot Latte: Coffee, Milk and Equipment Checks
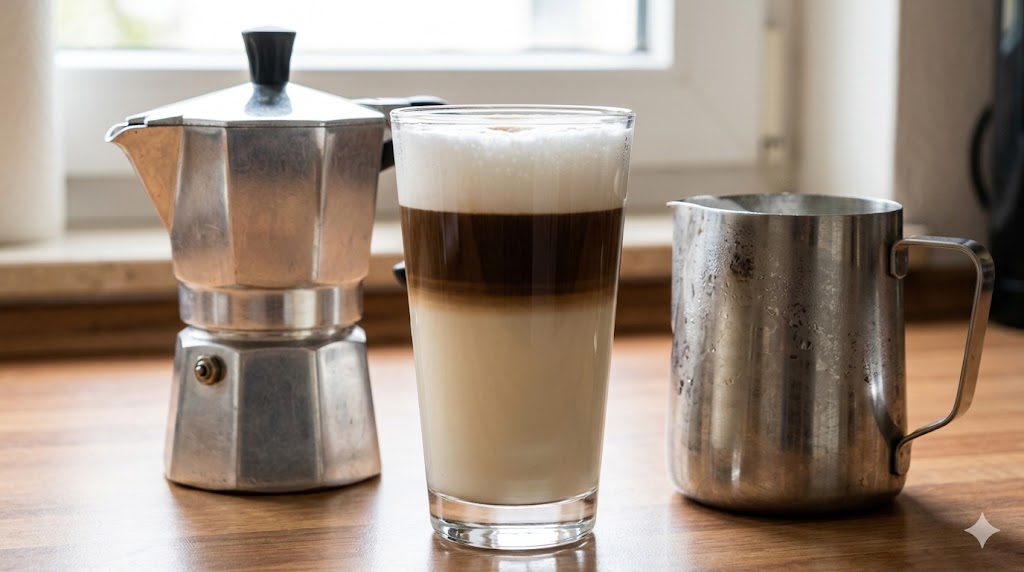
Prepare a milk drink with moka coffee using the matching equipment instructions. Compare recipe amounts, milk choices and frothing methods without cafe-equivalence claims. No documented blind-test dataset establishes equivalence with an espresso-based cafe latte.
Quick Answer
Prepare coffee and milk separately using the exact equipment instructions, measure the amounts you combine and adjust to taste within the cup and device limits. This guide does not establish a universal ratio, guaranteed yield or cafe-equivalent result.
Compare the Recipe You Actually Prepare
This guide uses moka coffee as the base for a milk drink. It does not document a trial establishing equivalence with an espresso-based cafe latte. The earlier 90% preference claim, universal pressure figures and fixed cafe-versus-home prices are withdrawn.
| Comparison | Record for Each Recipe |
|---|---|
| Coffee | Exact coffee, equipment and permitted preparation; measure the beverage used. |
| Milk and foam | Actual carton, quantity and compatible frothing program. |
| Taste | Your own observations under comparable serving conditions; no documented majority winner is supplied. |
| Cost and routine | Current ingredients, equipment, cleanup and maintenance; compare equal drinking quantities. |
Step 1: Prepare the Coffee Base
Match the Pot and Coffee
Identify the exact pot model and size, then use its instructions for permitted coffee, filling and heat-source compatibility. Choose a pot whose normal preparation suits the quantity you want; do not infer beverage yield from a nominal cup count or apply a partial-fill workaround without model instructions.
Choose coffee you like with the selected milk. Roast, origin and advertised tasting notes are starting points for personal comparison, not a universal ranking. Record the coffee, storage and grind used so you can repeat the recipe. This guide does not document a test excluding light roasts or validating one freshness window for every product.
Follow the Model Instructions
- Check the appliance condition and required assembly before use.
- Use the model's water and coffee filling instructions, rather than the earlier universal gram amount or cup-to-latte conversion.
- Use a compatible heat source and the manual's preparation and stopping instructions; a numerical stove dial setting is not transferable between cookers.
- Follow the handling and cooling instructions before serving, opening or cleaning the pot.
- Measure the prepared coffee for your recipe and record the actual yield.
The earlier 4–6 minute start, 5–8 minute total, 80% fill stopping point and ten-second cold-water procedure are withdrawn as universal instructions. No measured brewing trial is supplied here.
Step 2: Choose and Prepare Milk
Choose the Serving Amount
Measure the moka coffee you actually prepared and choose a milk amount that fits your cup and frothing-device limits. Record both amounts and adjust to taste. A moka pot's nominal cup count does not establish the yield of your recipe, and this guide does not validate a mandatory latte ratio.
Compare the Actual Milk Product
| Option | What to Check |
|---|---|
| Whole, reduced-fat or skim dairy milk | Check the carton ingredients and nutrition label, personal dietary needs and device instructions. Compare your prepared drink rather than assuming fat content establishes a taste or foam winner. |
| Oat drink | Check the particular formulation, added sugars and device compatibility. A barista label is not proof of measured sweetness or superior foam. |
| Soy drink | Check ingredients, dietary suitability and permitted use in the selected device. Results from another brand or formulation do not establish this product's results. |
| Almond drink | Check the label and assess your own texture and flavor. This guide has no comparative dataset justifying a blanket watery-texture rating or exclusion. |
The earlier creaminess and sweetness star scores and milk winner are withdrawn. No documented sensory or foam comparison supports those rankings.
Use the Equipment Instructions
- Confirm that the selected heating or frothing device permits your milk product.
- Follow its fill limits, operating sequence and handling instructions; do not copy settings from another appliance.
- If measuring temperature, use a suitable food thermometer. Steam appearance and a finger-in-milk test do not provide a measured temperature.
- Keep the preparation record with the recipe so you can compare your own results.
This guide does not establish a universal heating range or a temperature at which milk suddenly loses sweetness. The earlier claim that 160°F is a boiling threshold is withdrawn.
Step 3: Prepare Milk with a Suitable Device
| Device | Check Before Use |
|---|---|
| Handheld frother | Confirm permitted liquids and temperature, container requirements, immersion limits and operating sequence in the matching instructions. This guide does not establish a universal twenty-second cycle or microfoam result. |
| French press | Do not assume a coffee press is approved for frothing heated milk. Use it for this purpose only when the exact device instructions support the liquid and operation; a fixed pump count is not evidence of compatibility. |
| Electric milk frother | Check permitted milk products, separate heating/frothing fill limits, available programs and cleaning instructions. Features differ by model; automatic operation does not establish superior texture. |
Select equipment using its actual functions, current offer and suitability for your routine. The earlier price bands, difficulty stars, best-texture award and no-skill guarantee are withdrawn because no comparative dataset is documented.
Follow the device instructions and compare the result using the same milk and serving recipe. Record your preparation and observed texture rather than assuming a fixed cycle, foam thickness or volume increase. This guide does not validate universal latte-versus-cappuccino timing or foam percentages.
The previous sealed-hot-jar shaking and fixed microwave-time workaround remains withdrawn; arbitrary containers and lids are not established as suitable frothing equipment.
Step 4: Combine Your Prepared Ingredients
Use a cup suitable for the prepared drink and leave room for the amount you plan to serve. Check the cup's own care and handling instructions rather than assuming that every glass tolerates preheating or that every ceramic mug retains heat longer.
- Measure the coffee and prepared milk you want to combine, within the cup and equipment limits.
- Combine the ingredients with controlled handling; record amounts and your chosen sequence so you can repeat the recipe.
- Adjust milk and foam according to your taste and observed result. A fixed pouring height or foam thickness is not a validated requirement for every recipe.
- Assess the drink before serving; this guide does not establish a universal drinking temperature.
The earlier perfect formula, guaranteed gradient and fixed cup-size exclusion are withdrawn. Nominal pot size does not determine the finished drink quantity, and coffee-to-milk amounts are recipe choices rather than proof of cafe equivalence.
Step 5: Assess Foam and Optional Patterns
Evaluate foam texture and any pattern you attempt as results of your actual preparation. Use suitable equipment according to its instructions. This guide has no documented comparison establishing that one milk, pitcher, cup diameter or pot size guarantees a heart, rosetta or tulip.
If experimenting with appearance, record the milk product, frothing program, coffee and milk quantities, cup and pouring sequence. Compare one change at a time rather than treating the earlier universal heights, fill fractions and flow instructions as a tested method.
Flavor Choices and Recipe Records
Vanilla, caramel, chocolate, cinnamon, honey and pumpkin-spice flavors are optional recipe choices. Check ingredients and serving directions on the actual product. Sweetened sauces, honey and maple syrup are not sugar-free alternatives. Do not put flavorings or solids into a moka basket or frothing appliance unless its instructions permit them; adding them to a finished drink is a separate recipe choice.
Record the ingredient and amount you choose rather than treating the previous fixed spoon measures as a tested formula. For a cold variation, use suitable containers and the ingredient storage and equipment handling instructions. No fixed five-minute cooling time is established here for every preparation.
Compare Milk Drinks by Their Actual Recipe
Names such as latte, cappuccino, flat white, macchiato and cortado do not verify the exact coffee, milk, foam or serving quantity of the recipe in front of you. Check the recipe or cafe description and record the actual ingredients. The earlier universal ratio/size table and strength rankings are withdrawn.
Investigate Preparation Problems
| Observation | What to Check |
|---|---|
| Coffee flavor seems weak | Record coffee and milk quantities and compare taste preferences. The observation alone does not diagnose under-extraction or justify changing grind, fill or heat beyond model instructions. |
| Foam differs from your preference | Check the actual milk and available device programs. Adjust only within the device instructions; do not transfer pump counts or immersion advice from unrelated equipment. |
| Drink seems cooler than expected | Measure if needed with suitable equipment and review your serving sequence. Cup preheating and simultaneous appliance operation require suitable equipment and handling; no universal target is established here. |
| Ingredients do not blend as expected | Record the products, amounts and preparation. This guide has no experiment showing that a fixed pouring height or temperature solves every separation problem. |
Frequently Asked Questions
Can you make a real latte with a moka pot?
You can evaluate a milk drink made with prepared moka coffee and separately prepared milk, following the equipment instructions. This guide has no documented blind-test protocol or participant results establishing that it tastes nearly identical to an espresso-based cafe latte. Coffee-to-milk amounts and foam are recipe choices to assess, not a universal equivalence guarantee.
What's the difference between a latte and cappuccino with a moka pot?
Compare the coffee quantity, milk quantity and foam you actually prepare. Latte and cappuccino names do not establish a mandatory ratio or cup size for every moka recipe. This guide has no documented test supporting universal strength or texture rankings. Adjust to preference while following the equipment instructions.
How much milk do you need for a latte?
Choose a serving size that fits your cup and the frothing-device fill limits. Measure prepared coffee and milk rather than assuming a 3-cup or 6-cup moka label guarantees a particular yield. Record a recipe and adjust milk to taste; the earlier fixed quantities are not universal model instructions.
What's the best milk for lattes at home?
Choose milk by taste, ingredients, dietary needs and frothing-device instructions. Check the actual carton; formulations differ. This guide has no documented comparative foam or taste dataset establishing a best milk or runner-up. A barista label alone does not guarantee compatibility or results.
Can you do latte art with a moka pot?
You can experiment with patterns using a suitable pitcher and prepared coffee and milk. This guide does not document a method guaranteeing hearts or rosettas with every moka recipe. Follow the frothing-device instructions and record your preparation. Fixed pouring heights, times and temperatures are not validated for every setup.
How do you make a latte sweet without sugar?
To avoid adding sweeteners, leave out sugar, honey, maple syrup and sweetened flavorings, and check the milk or plant-drink label for added sugars. Milk can contain naturally occurring sugar, so no added sugar does not mean sugar-free. Honey and maple syrup add sugars when used as sweeteners. No particular heating temperature or roast is established here as making every drink sweeter.
Sugar terminology source: FDA: Added Sugars on the Nutrition Facts Label, reviewed September 30, 2026. This source explains sugar labeling and does not validate the brewing recipe.
Putting Your Recipe Together
Choose the exact coffee, milk product and equipment, then record the quantities and preparation you use. Compare your taste preference separately from the time, cleanup and cost of your routine. This guide does not document cafe-equivalence tests or a fixed homemade-versus-cafe saving.
For a cost comparison, use current ingredient and equipment prices, your actual serving quantities, permitted accessories and maintenance needs. State the assumptions and compare equal drinking quantities. The earlier $0.60 versus $4–6 claim is withdrawn.
Follow the equipment instructions and adjust recipe amounts within the applicable fill limits. Pattern-making and foam texture are outcomes to evaluate in your own preparation, not guaranteed results of a cup label, ratio or milk category.