How to Fix a Leaking Moka Pot: 7 Causes & Step-by-Step Solutions
Your moka pot is dripping water from the sides, valve, or filter. Here's exactly how to diagnose and fix every type of leak—most solutions take under 5 minutes and cost nothing.
Quick Fix (Works 80% of the Time)
- 1. Check the gasket – Remove the rubber seal from the bottom of the upper chamber. If it's cracked, hardened, or has lost flexibility, replace it ($3-8).
- 2. Clean the rim – Remove all coffee grounds from the rim of the lower chamber and the threads. Even tiny particles prevent proper sealing.
- 3. Don't over-tighten – Screw the chambers together firmly but not excessively. Over-tightening can deform the gasket.
- 4. Check filter alignment – Ensure the filter basket sits completely flat in the lower chamber before assembling.
There's nothing more frustrating than watching water drip from your moka pot while your morning coffee brews. A leaking moka pot not only makes a mess but also reduces the pressure needed to produce rich, bold coffee.
The good news: most leaks are easy to fix without tools or replacement parts. In fact, 60% of moka pot leaks are caused by simple issues like coffee grounds on the rim or an improperly seated filter basket.
Even if your gasket needs replacement (the most common cause), it's a 2-minute fix that costs $3-8.
This guide covers all 7 causes of moka pot leaks, with step-by-step solutions for each. By the end, you'll know exactly what's wrong with your moka pot and how to fix it.
Table of Contents
- 1. Worn or Damaged Gasket (Most Common)
- 2. Coffee Grounds on the Rim
- 3. Improper Filter Basket Alignment
- 4. Over-Tightening or Under-Tightening
- 5. Blocked or Faulty Safety Valve
- 6. Damaged Threads or Rim
- 7. Using Wrong Size Filter or Parts
- How to Prevent Future Leaks
- Where to Buy Replacement Parts
- FAQ
1. Worn or Damaged Gasket (Causes 70% of All Leaks)
The gasket is the rubber seal between the upper and lower chambers of your moka pot. It's the #1 cause of leaks because it naturally wears out with use.
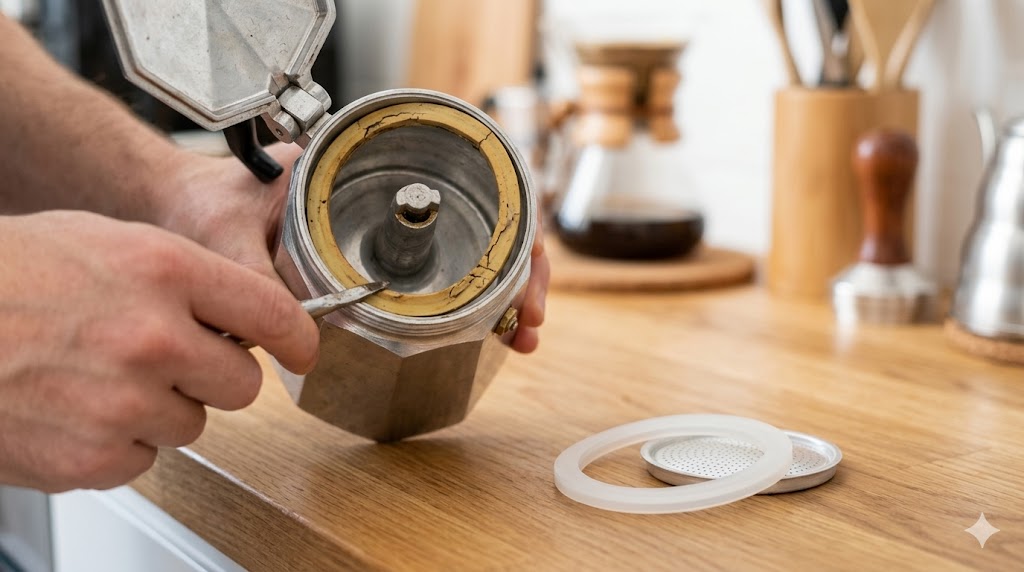
How to Identify a Bad Gasket
Remove the gasket from the bottom of the upper chamber (it should pull out easily). Check for these signs:
- Visible cracks or tears – Even tiny cracks prevent a proper seal
- Hardening – The gasket feels stiff instead of flexible and rubbery
- Deformation – The gasket has permanent grooves or won't return to its original shape
- Discoloration – Extreme darkening or white residue buildup
- Loss of thickness – The gasket feels thinner than it should be
How Long Do Gaskets Last?
| Usage Frequency | Expected Lifespan |
|---|---|
| Daily use | 6-12 months |
| 3-4 times per week | 12-18 months |
| Once a week | 18-24 months |
| Occasional use | 2-3 years |
How to Replace the Gasket (2-Minute Fix)
- 1. Remove the old gasket – Pull the rubber seal out from the groove in the bottom of the upper chamber. If it's stuck, use a toothpick to pry it out gently.
- 2. Clean the gasket groove – Use a damp cloth to remove all coffee residue and buildup from the groove. Old coffee oils prevent the new gasket from sealing properly.
- 3. Install the new gasket – Press the new gasket into the groove, ensuring it sits evenly all the way around. There should be no twists or gaps.
- 4. Test the seal – Assemble the moka pot (without coffee) and fill the bottom chamber with water. Brew a test run to ensure no leaking.
💡 Pro Tip: Order gaskets in packs of 3-5 to save money. Store extras in a cool, dry place. They last years when not in use.
Gasket Replacement Cost
- Bialetti brand gaskets: $6-10 (pack of 3)
- Generic gaskets: $3-5 (pack of 3)
- Premium silicone gaskets: $8-12 (last 2x longer than rubber)
2. Coffee Grounds on the Rim (Causes 20% of Leaks)
Even a single grain of coffee on the rim prevents the gasket from creating a proper seal. This is especially common when you fill the filter basket too full or use a very fine grind.
How to Fix It
- 1. Inspect the rim – Before assembling, check the rim of the lower chamber for any coffee grounds or residue.
- 2. Wipe the rim clean – Use a dry cloth or paper towel to wipe the rim completely clean. Pay special attention to the threaded area.
- 3. Clean the gasket seating area – Check the bottom of the upper chamber where the gasket sits. Wipe away any coffee residue.
- 4. Level the coffee carefully – When filling the filter basket, don't heap coffee above the rim. Level it off gently without pressing down.
Prevention tip: Use a slightly coarser grind if you consistently get grounds on the rim. Fine grinds are more likely to spill over during filling.
3. Improper Filter Basket Alignment
The filter basket must sit completely flat in the lower chamber. If it's tilted, raised, or blocked by coffee grounds underneath, it disrupts the seal and causes leaking.
How to Check Alignment
- Remove the filter basket and check for coffee grounds or mineral buildup on the bottom of the lower chamber
- Place the filter basket back in and ensure it sits level—no gaps between the basket and chamber bottom
- Check that the tube from the filter extends fully into the water without being bent or blocked
How to Fix It
- 1. Clean the lower chamber – Remove any residue from the bottom where the filter basket sits.
- 2. Check the filter basket for damage – Ensure it's not dented or warped. A damaged basket won't sit flat.
- 3. Reassemble carefully – Place the filter basket down gently, ensuring it's fully seated before adding coffee.
4. Over-Tightening or Under-Tightening
There's a Goldilocks zone for tightening your moka pot—too loose and it leaks, too tight and you damage the gasket.
Over-Tightening Problems
- Compresses and permanently deforms the gasket
- Can crack aluminum on older moka pots
- Makes the pot difficult to open after brewing
- Actually increases leak risk because the gasket loses its shape
Under-Tightening Problems
- Prevents the gasket from making full contact
- Allows steam and water to escape from the sides
- Reduces brewing pressure, resulting in weak coffee
How to Tighten Correctly
The right technique: Hold the lower chamber and turn the upper chamber until you feel resistance. Then give it one more gentle turn—about 1/4 to 1/2 turn past initial resistance. You should feel firm, but it shouldn't require excessive force.
Rule of thumb: If you need to use a towel for grip or your hand hurts from tightening, you're over-tightening. Firm hand pressure should be enough.
5. Blocked or Faulty Safety Valve
The safety valve (the small metal button or bolt on the side of the lower chamber) releases excess pressure. If it's blocked, damaged, or loose, it can leak water or cause pressure issues that lead to leaking elsewhere.
How to Check the Safety Valve
- Visual inspection: Look for coffee residue, mineral buildup, or corrosion around the valve
- Manual test: Gently press the valve—it should move freely and return to position
- Water leak test: Fill the lower chamber with water (no coffee) and check if water drips from the valve when you tilt it
How to Clean the Safety Valve
- 1. Remove the valve – Most safety valves unscrew counterclockwise. Some older models have non-removable valves.
- 2. Clean with a toothpick – Use a toothpick or needle to clear any blockage from the small hole. Don't use metal tools that might damage the valve.
- 3. Soak if necessary – For stubborn buildup, soak the valve in white vinegar for 15 minutes, then rinse thoroughly.
- 4. Reinstall – Screw the valve back in hand-tight. Don't over-tighten or you might strip the threads.
⚠️ Safety Warning: NEVER use a moka pot with a blocked or non-functional safety valve. The valve prevents dangerous pressure buildup. If cleaning doesn't fix it, replace the entire lower chamber or buy a new moka pot.
When to Replace the Safety Valve
Replace if: the valve is corroded, the threads are stripped, water leaks around the valve even when clean, or the valve doesn't move freely. Replacement valves cost $5-10.
6. Damaged Threads or Rim
Physical damage to the threads or rim of either chamber prevents a proper seal. This usually happens from:
- Dropping the moka pot
- Cross-threading when assembling
- Using force to open a stuck moka pot
- Long-term wear (after 10+ years of use)
How to Inspect for Damage
- 1. Check the rim – Look for dents, dings, or deformation on the rim of the lower chamber where the gasket seals.
- 2. Inspect threads – Examine both sets of threads for stripped areas, cross-threading damage, or bent sections.
- 3. Test alignment – Screw the chambers together without the gasket—they should thread smoothly without resistance or grinding.
Can You Fix Damaged Threads?
Minor thread damage can sometimes be fixed with a thread file, but this requires metalworking skills. For most people, damaged threads mean it's time for a replacement.
Replacement options:
- Replace the damaged part – Some manufacturers sell individual upper or lower chambers
- Buy a new moka pot – Often more cost-effective than replacing individual parts for budget models
- Upgrade – If your moka pot has structural damage, consider upgrading to a more durable model like the Bialetti Brikka or Venus
7. Using Wrong Size Filter or Parts
Mixing parts from different moka pots or using the wrong size gasket creates gaps that cause leaks. This happens when:
- You replace the gasket with the wrong size
- You lose a part and substitute from a different moka pot
- You buy generic replacement parts that don't fit properly
How to Identify Your Moka Pot Size
Moka pots are measured in cups (Italian espresso cup size = 2oz). Common sizes:
| Size | Capacity | Gasket Diameter |
|---|---|---|
| 1-cup | 60ml / 2oz | ~50mm |
| 3-cup | 150ml / 5oz | ~65mm |
| 6-cup | 300ml / 10oz | ~78mm |
| 9-cup | 450ml / 15oz | ~88mm |
| 12-cup | 600ml / 20oz | ~95mm |
💡 Pro Tip: Measure your old gasket's outer diameter with a ruler before ordering replacements. Most product listings include dimensions to help you match the correct size.
How to Fix It
- 1. Verify your moka pot size – Check the bottom of your moka pot for markings (e.g., "6 tazze" = 6 cups).
- 2. Order the correct gasket size – When buying replacements, match both the cup size AND brand if possible.
- 3. Keep parts together – If you own multiple moka pots, don't mix parts between them, even if they look similar.
How to Prevent Future Leaks
✅ Daily Habits
- • Wipe the rim clean before every use
- • Don't overfill the filter basket
- • Tighten firmly but never force it
- • Let it cool before opening
🧼 Weekly Maintenance
- • Deep clean the gasket and groove
- • Check safety valve for blockages
- • Inspect filter basket alignment
- • Remove mineral buildup with vinegar
📅 Monthly Checks
- • Inspect gasket for cracks/hardening
- • Check threads for damage
- • Test safety valve function
- • Replace gasket if showing wear
💾 Storage Tips
- • Store with chambers separated
- • Keep gasket in place (not removed)
- • Store in dry location
- • Keep spare gaskets sealed
🔄 Gasket Replacement Schedule
Don't wait for a leak to develop. Replace your gasket proactively based on usage:
- Daily use: Every 6 months
- 3-4x per week: Every 9-12 months
- Weekly use: Every 12-18 months
- Or anytime you notice: Loss of flexibility, visible cracks, discoloration, or reduced seal quality
Where to Buy Replacement Parts
Gaskets
| Brand/Type | Price | Best For |
|---|---|---|
| Bialetti Official Gaskets | $7-10 (3-pack) | Bialetti pots, guaranteed fit |
| Generic Rubber Gaskets | $3-5 (3-pack) | Budget-friendly universal fit |
| Silicone Gaskets | $8-12 (3-pack) | 2x longer lifespan, heat resistant |
| Alessi/Luxury Brand | $12-15 (1-pack) | Premium pots, exact specifications |
Other Common Replacement Parts
- Filter Basket: $5-12 (varies by size and brand)
- Safety Valve: $5-10
- Filter Plate (top screen): $3-8
- Complete Upper Chamber: $15-40 (depending on size)
- Complete Lower Chamber: $20-50 (depending on size)
Where to buy: Amazon, eBay, manufacturer websites, specialty coffee shops, or Italian import stores. Always verify the size and compatibility before ordering.
When to Buy a New Moka Pot Instead
If your moka pot needs multiple replacement parts (gasket + filter + valve), it might be more cost-effective to buy a new one. Consider replacement if:
- Replacement parts cost more than 50% of a new moka pot
- The pot has structural damage (cracks, severe dents, damaged threads)
- It's a low-quality model that constantly leaks despite repairs
- You want to upgrade to a better model with induction compatibility or improved design
Check out our best moka pots guide for quality options that rarely develop leaks, or our budget moka pots under $30 if you need an affordable replacement.
Frequently Asked Questions
Why is my moka pot leaking from the sides?
The most common cause is a worn or damaged gasket (rubber seal). The gasket creates a seal between the upper and lower chambers. When it wears out, hardens, or cracks (typically after 6-12 months of daily use), water and steam escape from the sides. Solution: Replace the gasket for $3-8. Also check for coffee grounds on the rim preventing proper sealing.
How often should I replace my moka pot gasket?
Replace your gasket every 6-12 months with daily use, or when you notice:
- Visible cracks or tears
- Hardening or loss of flexibility
- Deformation or permanent grooves
- Persistent leaking despite cleaning
Light users (2-3 times per week) can expect 12-18 months before replacement.
Can I fix a leaking moka pot without replacing parts?
Yes, in many cases. Try these free solutions first:
- Clean the gasket and gasket groove thoroughly
- Remove coffee grounds from rim and threads
- Ensure filter basket sits flat
- Clear safety valve blockage with a toothpick
- Don't over-tighten when assembling
If these don't work, the gasket likely needs replacement ($3-8).
Is it safe to use a leaking moka pot?
Minor leaks are not dangerous but should be fixed promptly. However, stop using the moka pot if:
- Steam violently escapes from sides during brewing
- The safety valve is blocked or not functioning
- There's structural damage or cracks in the aluminum
- The leak worsens during brewing
These conditions can cause dangerous pressure buildup. Fix the issue before using again.
Why is my new moka pot leaking?
If your brand-new moka pot leaks, it's usually due to: (1) Not tightening enough—new gaskets are stiff and need firm tightening; (2) Manufacturing defect—check all parts are properly installed; (3) Coffee grounds on the rim from first use—clean thoroughly before assembling; (4) Wrong assembly—ensure filter basket is completely seated. If it still leaks after checking these issues, contact the manufacturer for a replacement under warranty.
Can I use any gasket for my moka pot?
While many gaskets are labeled "universal," it's best to use the correct size for your moka pot. Gaskets are sized by cup capacity (1-cup, 3-cup, 6-cup, etc.). An incorrectly sized gasket won't seal properly. Measure your old gasket's outer diameter or check your moka pot's cup size (usually marked on the bottom). Silicone gaskets last 2x longer than rubber but cost slightly more ($8-12 vs $3-8 for 3-pack).
Why does my moka pot leak only sometimes?
Intermittent leaking usually means: (1) Inconsistent tightening—sometimes you tighten more than others; (2) Coffee grounds on rim—only leaks when grounds prevent sealing; (3) Gasket is borderline worn—works when conditions are perfect, fails when there's any issue; (4) Water level variations—overfilling increases pressure and leak risk. The gasket is probably nearing the end of its life and should be replaced soon.
Can I boil my gasket to make it more flexible?
No, don't boil rubber gaskets—it accelerates degradation and causes them to lose shape. Instead, if your gasket feels stiff: (1) Soak in warm (not hot) soapy water for 10 minutes; (2) Gently work the gasket with your fingers to restore some flexibility; (3) Ensure the gasket groove is clean—residue can make gaskets feel stiff. However, if the gasket has hardened from age and heat exposure, these are temporary fixes. Replace it for $3-8 for permanent solution.
Final Thoughts
A leaking moka pot is frustrating, but it's almost always an easy fix. In 80% of cases, you can solve the problem in under 5 minutes with simple cleaning or a $3-8 gasket replacement.
Quick Recap:
- 1. Start with the gasket – It causes 70% of all leaks
- 2. Clean everything – Coffee grounds on the rim cause 20% of leaks
- 3. Check alignment – Ensure the filter basket sits flat
- 4. Tighten correctly – Firm but never forced
- 5. Maintain the safety valve – Clean monthly to prevent blockages
If you've tried everything and your moka pot still leaks, it might be time for an upgrade. Check out our expert reviews of the best moka pots, featuring models with improved gasket designs and better sealing systems.
For maintenance tips to keep your moka pot in perfect condition, read our guide on how to clean a moka pot properly.